[German]
Microsoft Windows Support Diagnostic Tool (MSDT) Remote Code Execution Vulnerability CVE-2022-30190.
The CVE-2022-30190 vulnerability, also known as Follina, allows the Windows Support Diagnostic Tool (MSDT) to be exploited, for example via MS Office files. As a workaround, you can deactivate the tool by deleting an entry in the registry. Please always be careful and only delete registry entries etc. if you know exactly what you are doing. The path described here is a general description of how I can distribute scripts in the KACE SMA. No guarantee! Watch what you do! That’s only an example!
With a click on the picture you will be forwarded to YouTube:
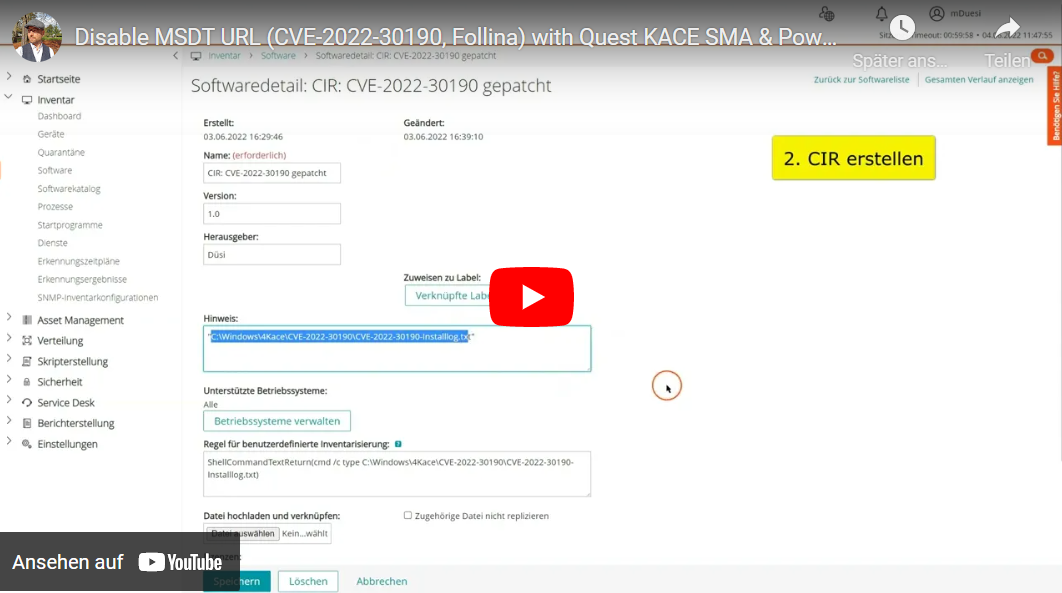
 In this video we see how we create a script distribution in the Quest KACE SMA, a custom inventory field (Custom Inventory Rule CIR) and based on it a smart label, depending on which the script is distributed. Let’s go in order.
1. Script distribution
In the „Scripting“ menu we go to „Scripts“ and create a new script. We enter a name and other information. In such cases, I always choose the CVE number as the name.
As always, we choose which devices to run the script on, we’ll do that later with our Smart Lab.
We also set a schedule.
In this case I’ve written a PowerShell script which I’m uploading here as a „dependency“. The PowerShell script, the sample here is a little larger than it needs to be.
# 01.06.2022 M. Düsi, duesiblog.de

# CVE-2022-30190

# No guarantee! Watch what you do! That's only an example!
# variables
$path = "C:\Windows\4Kace\CVE-2022-30190"
$exportfilename = "ms-msdt-export.reg"
$regpath = "REGISTRY::HKEY_CLASSES_ROOT\ms-msdt"
$regpathex = "HKEY_CLASSES_ROOT\ms-msdt"
$installlogfile = "CVE-2022-30190-Installlog.txt"
# get and format time
function Get-TimeStamp {
return "[{0:dd/MM/yyyy} {0:HH:mm:ss:fff}]" -f (Get-Date)
}
# create folder
If(!(test-path $path))
{
New-Item -ItemType Directory -Force -Path $path
}
# Check if Registry Path exists
if(Test-Path $regpath){
# Log
"$(Get-TimeStamp) $regpath exists" | Out-File -FilePath $path\$installlogfile -Append
# Export /y overwrites existing .reg-file
reg export $regpathex $path\$exportfilename /y
# Log
"$(Get-TimeStamp) $regpath $path\$exportfilename exported" | Out-File -FilePath $path\$installlogfile -Append
# delete Regkey
Remove-Item REGISTRY::HKEY_CLASSES_ROOT\ms-msdt -Recurse -Force
# Log
"$(Get-TimeStamp) $regpath $path\$exportfilename deleted" | Out-File -FilePath $path\$installlogfile -Append
"$(Get-TimeStamp) CVE-2022-30190 patched" | Out-File -FilePath $path\$installlogfile -Append
} else {
# Log
"$(Get-TimeStamp) $regpath does NOT exist" | Out-File -FilePath $path\$installlogfile -Append
"$(Get-TimeStamp) CVE-2022-30190 patched" | Out-File -FilePath $path\$installlogfile -Append
}
# Force Inventory
$runkbot = "C:\Program Files (x86)\Quest\KACE\runkbot.exe"
$runkbotptions = @('4','0')
& $runkbot $runkbotptions
As so often, there are many ways to reach your goal. Here we only want to delete one registry entry. For example, in the „Verify“ step, we could check whether the registry entry exists and only if so, run the script that deletes the entry. In the example, however, I want to save all information as a custom inventory field per client and also export the affected registry entry before deleting it. I packed the fiction into my PowerShell script.
So I skip the verification and run my PowerShell script with parameters right on „success“. After saving, we move on to the next point.
2. Create a Custom Inventory Rule (custom inventory field)
We go to „Inventory“ -> „Software“ in the menu and create a new entry. I always start Custom Inventory Rule entries with „CIR:“ in the name. My PowerShell script under point 1 creates a log file on each client. And I read the content of this log file here for each client and save it as a custom inventory field. I can evaluate the content of this field later. For example on which clients the registry entry was deleted in case I want to restore it on the clients. And I can create a smart label with the log file.
After saving the entry we go to the next point.
3. Smart label
In the menu we go to „Home“ -> „Label management“ and create a new smart label.
I select the software entry created under point 2 and specify that a smart label is to be assigned to all devices whose software entry does NOT state in exactly the field that the vulnerability has been patched.
For a better understanding: this is what the log file of the PowerShell script looks like. The last line has the word „patched“ and I use that word to create my smart label.
[06.03.2022 16:39:57:870] REGISTRY::HKEY_CLASSES_ROOT\ms-msdt exists

[06.03.2022 16:39:57:917] REGISTRY::HKEY_CLASSES_ROOT\ms-msdt C:\Windows\4Kace\CVE-2022-30190\ms-msdt-export.reg exported

[06.03.2022 16:39:57:917] REGISTRY::HKEY_CLASSES_ROOT\ms-msdt C:\Windows\4Kace\CVE-2022-30190\ms-msdt-export.reg deleted

[06.03.2022 16:39:57:917] CVE-2022-30190 patched
Now all I have to do is enter and save a name for the new label in the „Select label“ field.
Let’s go to our script created in point 1. There we set in the „Install“ area that the script should be executed on the clients that have the smart label.
For very important scripts, you can run them immediately or send them once to all Windows clients. Here I show you how to use Smart Labels for practice purposes, because they can be used very sensibly.
I wish you every success with it!
Links:
- cve.mitre.org/CVE-2022-30190
- msrc-blog.microsoft.com/guidance-for-cve-2022-30190-microsoft-support-diagnostic-tool-vulnerability/
Stay blogged. 😎
Dein Matthias Düsi
- Alle Artikel zum Thema KACE SMA
- Alle Artikel zum Thema Clientmanagement
- Alle Artikel zum Thema Digitalisierung